 After experiencing Ransomware a few times during the past months in our corporate setup I decided to scribble down some cleanup notes and things you can do to combat this.
This guide is seen from the point of a sysadmins and thus not from an enduser, however some tricks may apply even so (depending on various factors). In addition, this guide focuses on the cleanup of the server and not the client computer, which in my opinion always should be reinstalled after an incident like this.
This guide also assume that you have Shadowcopy enabled on your server; if not then you will need to go for a restore from backup (this however also loosely covered in the guide). See the good thing about Shadowcopy is, that as the server is not infected nor is the servers shadowcopy – you thus have quick access to non-corrupted data from here quite easily and quickly. Client wise things are different as most ransomeware clears the shadowcopy locally to ensure against easy cleanup locally, I heard that this may fail if the user is not a local administrator on his/her pc, so you may still have a straw to cling to if this is the case for recovering the local data easily.
Background.
First, let me sum up what this ransomware is all about.
Ransomware is a special type of malware, opposed to a regular virus it is not as much aimed at spreading but more focuses on its area of business (to extort users to pay to regain access to their data). Ransomware is often spread via phishing mails, you may receive a mail stating that you have a package at the post office (just one example) and that you need to download and open the linked file to get the details. Once you download and run the file from the phishing mail, it will execute the ransomware software, which will run in the background encrypting your files without you noticing it (to begin with).
It is very hard protecting against malware like this, as the makers of this type of malware keep changing the software to avoid detection. Furthermore, antivirus is only of limited help as it cannot restore files that has been encrypted.
Ransomware usually starts by encrypting local files first and then move on to server shares.
Ransomware is actually not a new thing; it has existed since the MS-dos days in some form or other. I recall a very old virus that infected your boot sector, and upon the trigger event (could be a date or a number of boots) it would delete your fat table and bring up a slot machine, if you won the game you would get your FAT table back if not everything was lost. Same but different.
How to get your data back after it being encrypted? Well best bet is backups, hopefully you have either backups on some USB disk or in the cloud, if not you are likely in serious problems. You can also choose to pay the ransom and have your data de-crypted, the price for this is usually around 100€ or 100$ depending, and from what I have heard it should work quite well and reliable to get your data back this way – some of the ransomware vendors should even have kind of customer support to assist you if you have problems – but supporting organized crime hardly seem like a good idea in the long run.
Anyhow, let us move on to the “fun” part, how to clean-up a file server after a visit from a client infected with ransomware.
So you have been struck by Ransomware (Cryptolocker, Cryptowall, Cryptodefence etc etc etc), “congratulations” and welcome to the club 🙁
Let us go through some steps to get things back on the road.
Important tip;
If you are using Shadowcopy on your server, DO NOT START CLEANUP BEFORE DATA HAS BEEN RESTORED – you may just waste storage space from your shadowcopy pool and thus be able to restore less data.
Step 1 – Stop the disaster from escalating.
You need to figure out which user is infected and stop this users pc from encrypting more files on your servers, if you are not fast to react your server will quickly look like this (the white is the infected files, it’s a mess).
Step 1.1 – how to identify the user
There are obviously different tactics for this, but two obvious once are;
1) look at an encrypted file and determine the owner – now to my surprise this did not work on the last server I looked at, here all the files for some reason was set to be owned by the local administrator group.
2) Look at the home folder for your users – most ransomware drop files on how to decrypt your data and these may serve as tell tail signs of “infection”.


Thus, the user with all the “decrypt” files in his homedrive will be the user you are after. Simply search the user’s folder for files with the word “decrypt” in it. The ransomware normally also targets the users local drives first, thus you may catch a lucky break if you like us have redirected the “My Documents” folder to the users home directory on the server, in our cases this meant that the infected users had tons of these files on his home share.
Step 1.2 – Shutdown the user’s computer
Shutdown the user’s computer and change the password of the user (as the user has malware on his/her computer his/her passwords (all of them) are likely now compromised.
Step 2 – Assess the damage
You now need to look at the server to determine how much data have been encrypted. How to determine the “infection” rate, well that depends – different ransomware uses different tactics, however at least for now they seem to share these tactics.
1) The ransomware will encrypt files, then add some extension to the file to show that it is encrypted (the extension may vary, but could be .encrypted or .iufasee or something totally different/random – but still the same for all encrypted files).
2) After encrypting a complete folder ransomware will often add 2-4 files that pertain to how to decrypt data, these files could be named “HELP_DECRYPT.TXT” / “HELP_DECRYPT.BMP” / “HOW_DECRYPT.TXT” / “!Decrypt-All-Files-iufasee.bmp” or anything like that.
NOTE: the ransomware is quite clever as not to change the creationdata/last modified date as this makes it hard to just look for files changed in the past 24h – however, as I mentioned in step two then the ransomware often creates “how to decrypt” files/pictures/links in the folders and these may be used to spot the “infection”.
My suggestion is;
- Try to determine the file extension using the tips above.
- Use Windirstat to get an idea of the scope of the incident (you can see an example below) http://windirstat.info/
- See screenshoot (the white is the encrypted/infected data).

Step 3 – Restoring data (the non-encrypted files)
See we had a special challenge with restoring data as we use online backup, and the restore hence will take a LONG time seeing that the data need to come from the WAN restoring gigabytes of data would take a LONG time, so we had to get creative to make the cleanup as fast as possible.
You first need to determine the time for the last backup/shadowcopy snapshot before the “infection” occurred.
If you have shadow copy, then go back through the snapshots to find the time where files had their original extension. You may get best results if you look at the infected users home folder, this is likely the first folder to be “infected” (you can also look at the creation date/time of the “how to decrypt” files which may give you a lead).
If you have local backup it is quite easy I guess, just restore more or less all data (with the do not overwrite newer/changed versions option set) and then proceed to delete the encrypted data and the “help files” (the once on how to decrypt) – see section below on how to cleanup.
If however you cannot easily restore data from backup (like e.g. if you use “online backup” like we did), then move to shadowcopy (which you hopefully have enabled on the server).
You could of cause restore one file/folder at the time from shadowcopy, this will take forever especially if users have worked on the folder structure meanwhile. So why not make it fast and easy by using robocopy (yes it is actually possible to use Robocopy, we found a cool way to do this).
Restoring non encrypted data via ShadowCopy and Robocopy.
- Determine the “last good” shadowcopy, the one just before files started to be encrypted.
- On the server list the shadowcopy snapshots using the dos command, you do this to get the “identifier” which we will need in a moment.Start an administrative command prompt and issue the command;
vssadmin list shadows
(you may need to change drive to the drive you want to see)This will give you a long list of available snapshots, see screenshot.
 Look for the creation time and find the block just before the incident occurred.
In this block “Contents of shadow copy set ID {…….}” look for the line “Shadow Copy Volume”, copy this line to a notepad starting with \\
In this example;

\\?\GLOBALROOT\Device\HarddiskVolumeShadowCopy107
NOTE: the number at the end will be different for you.
IMPORTANT! Now add a “\” to the line in notepad: \\?\GLOBALROOT\Device\HarddiskVolumeShadowCopy107\
Finally add a prefix of “mklink /d c:\restore ” to the line in notepad.
So the final line should look like this;
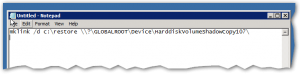
mklink /d c:\restore \\?\GLOBALROOT\Device\HarddiskVolumeShadowCopy107\
(note: the c:\restore is a folder/name YOU choose, it can basically be anything you choose, the name must NOT exist before you run the command)Now run this command from the administrative command prompt.

It should give you a feedback much like;
symbolic link created for c:\restore <<===>> \\?\GLOBALROOT\Device\HarddiskVolum eShadowCopy107\

Now if you write;
dir c:\restore
you will have a historic view of how the disk looked at the time of the shadowcopy snapshot, you could get the same via properties “previous version”… but this is much neater as you can access and script it.
- Now we have the snapshot mounted we can run a robocopy job restoring any data that is not more recent or changed.In this example the command would be something like;ROBOCOPY C:\restore D:\ *.* /XC /XO /E /LOG:d:\restore.log
 You will need to suit it to your environment.
Things to make a note of are the /XC /XO command switches which ensures that we do not overwrite files modified after the “infection”. As the encrypted “infected” files have a different extinction this is not a problem.
After the restore you can review the restore.log file to see if anything went wrong and see how much data was restored.
Note, you MAY run into the problem that not everything was in shadowcopy in which case you have to revert to backups, in the incidents we have had “only” 10-20 gb of data was “infected” and our shadowcopy could easily accommodate this.
Step 4 – CleanUp
Final step is to clean up the encrypted files and the decrypt instructions.
Also remove the “directory link” to the shadowcopy snapshot if you used that (see previous section), you can just use “RD <directory name>”.
I used SearchMyFiles from http://www.nirsoft.net/ as it is easy and very customizable to use to find files, I suggest you take not more than 10.000 files at the time as deleting many files takes quite some time.

Mitigation strategy
- On fileservers, try to limit access as much as possible – if nothing more than look at making data read-only wherever possible as this alone will protect you greatly.
- FSRM – File Server Resources Monitor, set this up to detect and trigger alarms on new files where the word decrypt is part of the name – decrypt as part of a filename is uncommon enough to give only limited false alarms – I will create a separate article on the configuration of this later.
- Supporters / super users – instruct them to react FAST to tell tail signs of ransomware, the faster you manage to stop the “infection” the less to clean up.
Tools that may be useful;
Decrypt Cryptolocker (this most likely will not work, but give it a go anyhow just in case).
https://www.decryptcryptolocker.com/
Windirstat http://windirstat.info/
SearchMyFiles http://www.nirsoft.net/
Read more about Cryptolocker; http://en.wikipedia.org/wiki/CryptoLocker
Thanks to:
Torben Slaikjer for finding that link on how to mount shadowcopy snapshot as a directory, this made the job vastly easier.

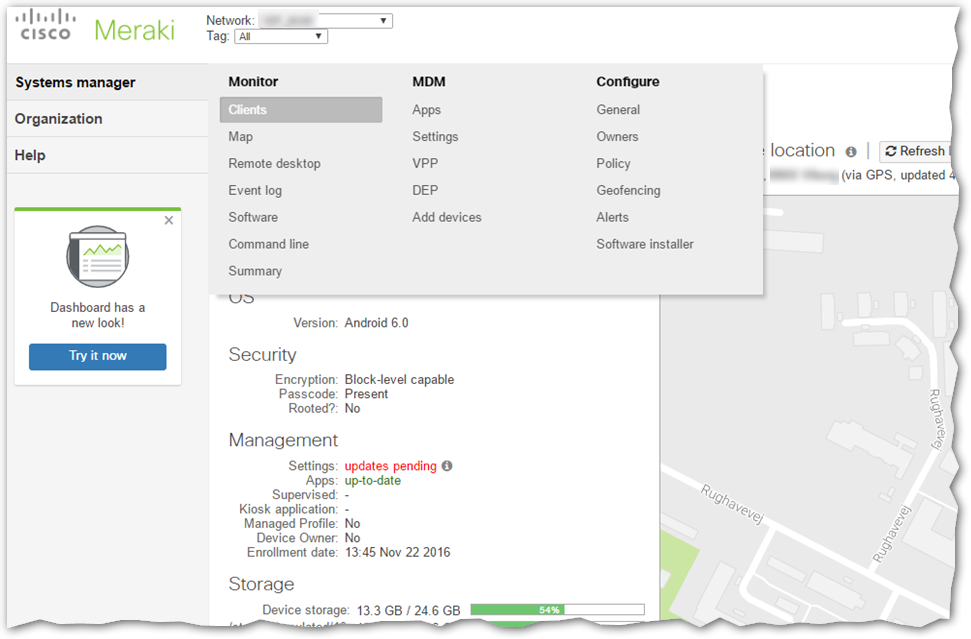 MDM or Mobile Device Management has become increasingly popular over the last few years. I was surprised to find, that when we implemented it in the company I work for we discovered that there actually was a few users without a pin or password on their mobile device (to be expected out of a few thousand users I guess, but still – NO PIN on your phone, REALLY!!!)!?


 Have you ever had a USB device that for the life of you would not work properly, perhapes even only on one specific computer!? Well, sometimes it’s caused by drivers that somehow malfunction and it can be a hell to debug.


![2015-01-21 14_31_05-2.doc [Compatibility Mode] - Word](https://readmydamnblog.com/wp-content/uploads/2015/01/2015-01-21-14_31_05-2.doc-Compatibility-Mode-Word.png)

